Quick Start Guide
Setup in Zeotap CDP
Create an iOS source in your Zeotap CDP account. How to create an iOS source?
Obtain the write key from the created source. How to obtain a write key?
Installation
CocoaPods (Recommended)
Add the following line to your Podfile:
pod 'ZeotapCollect', '~> 1.3.10'
Then run:
pod install
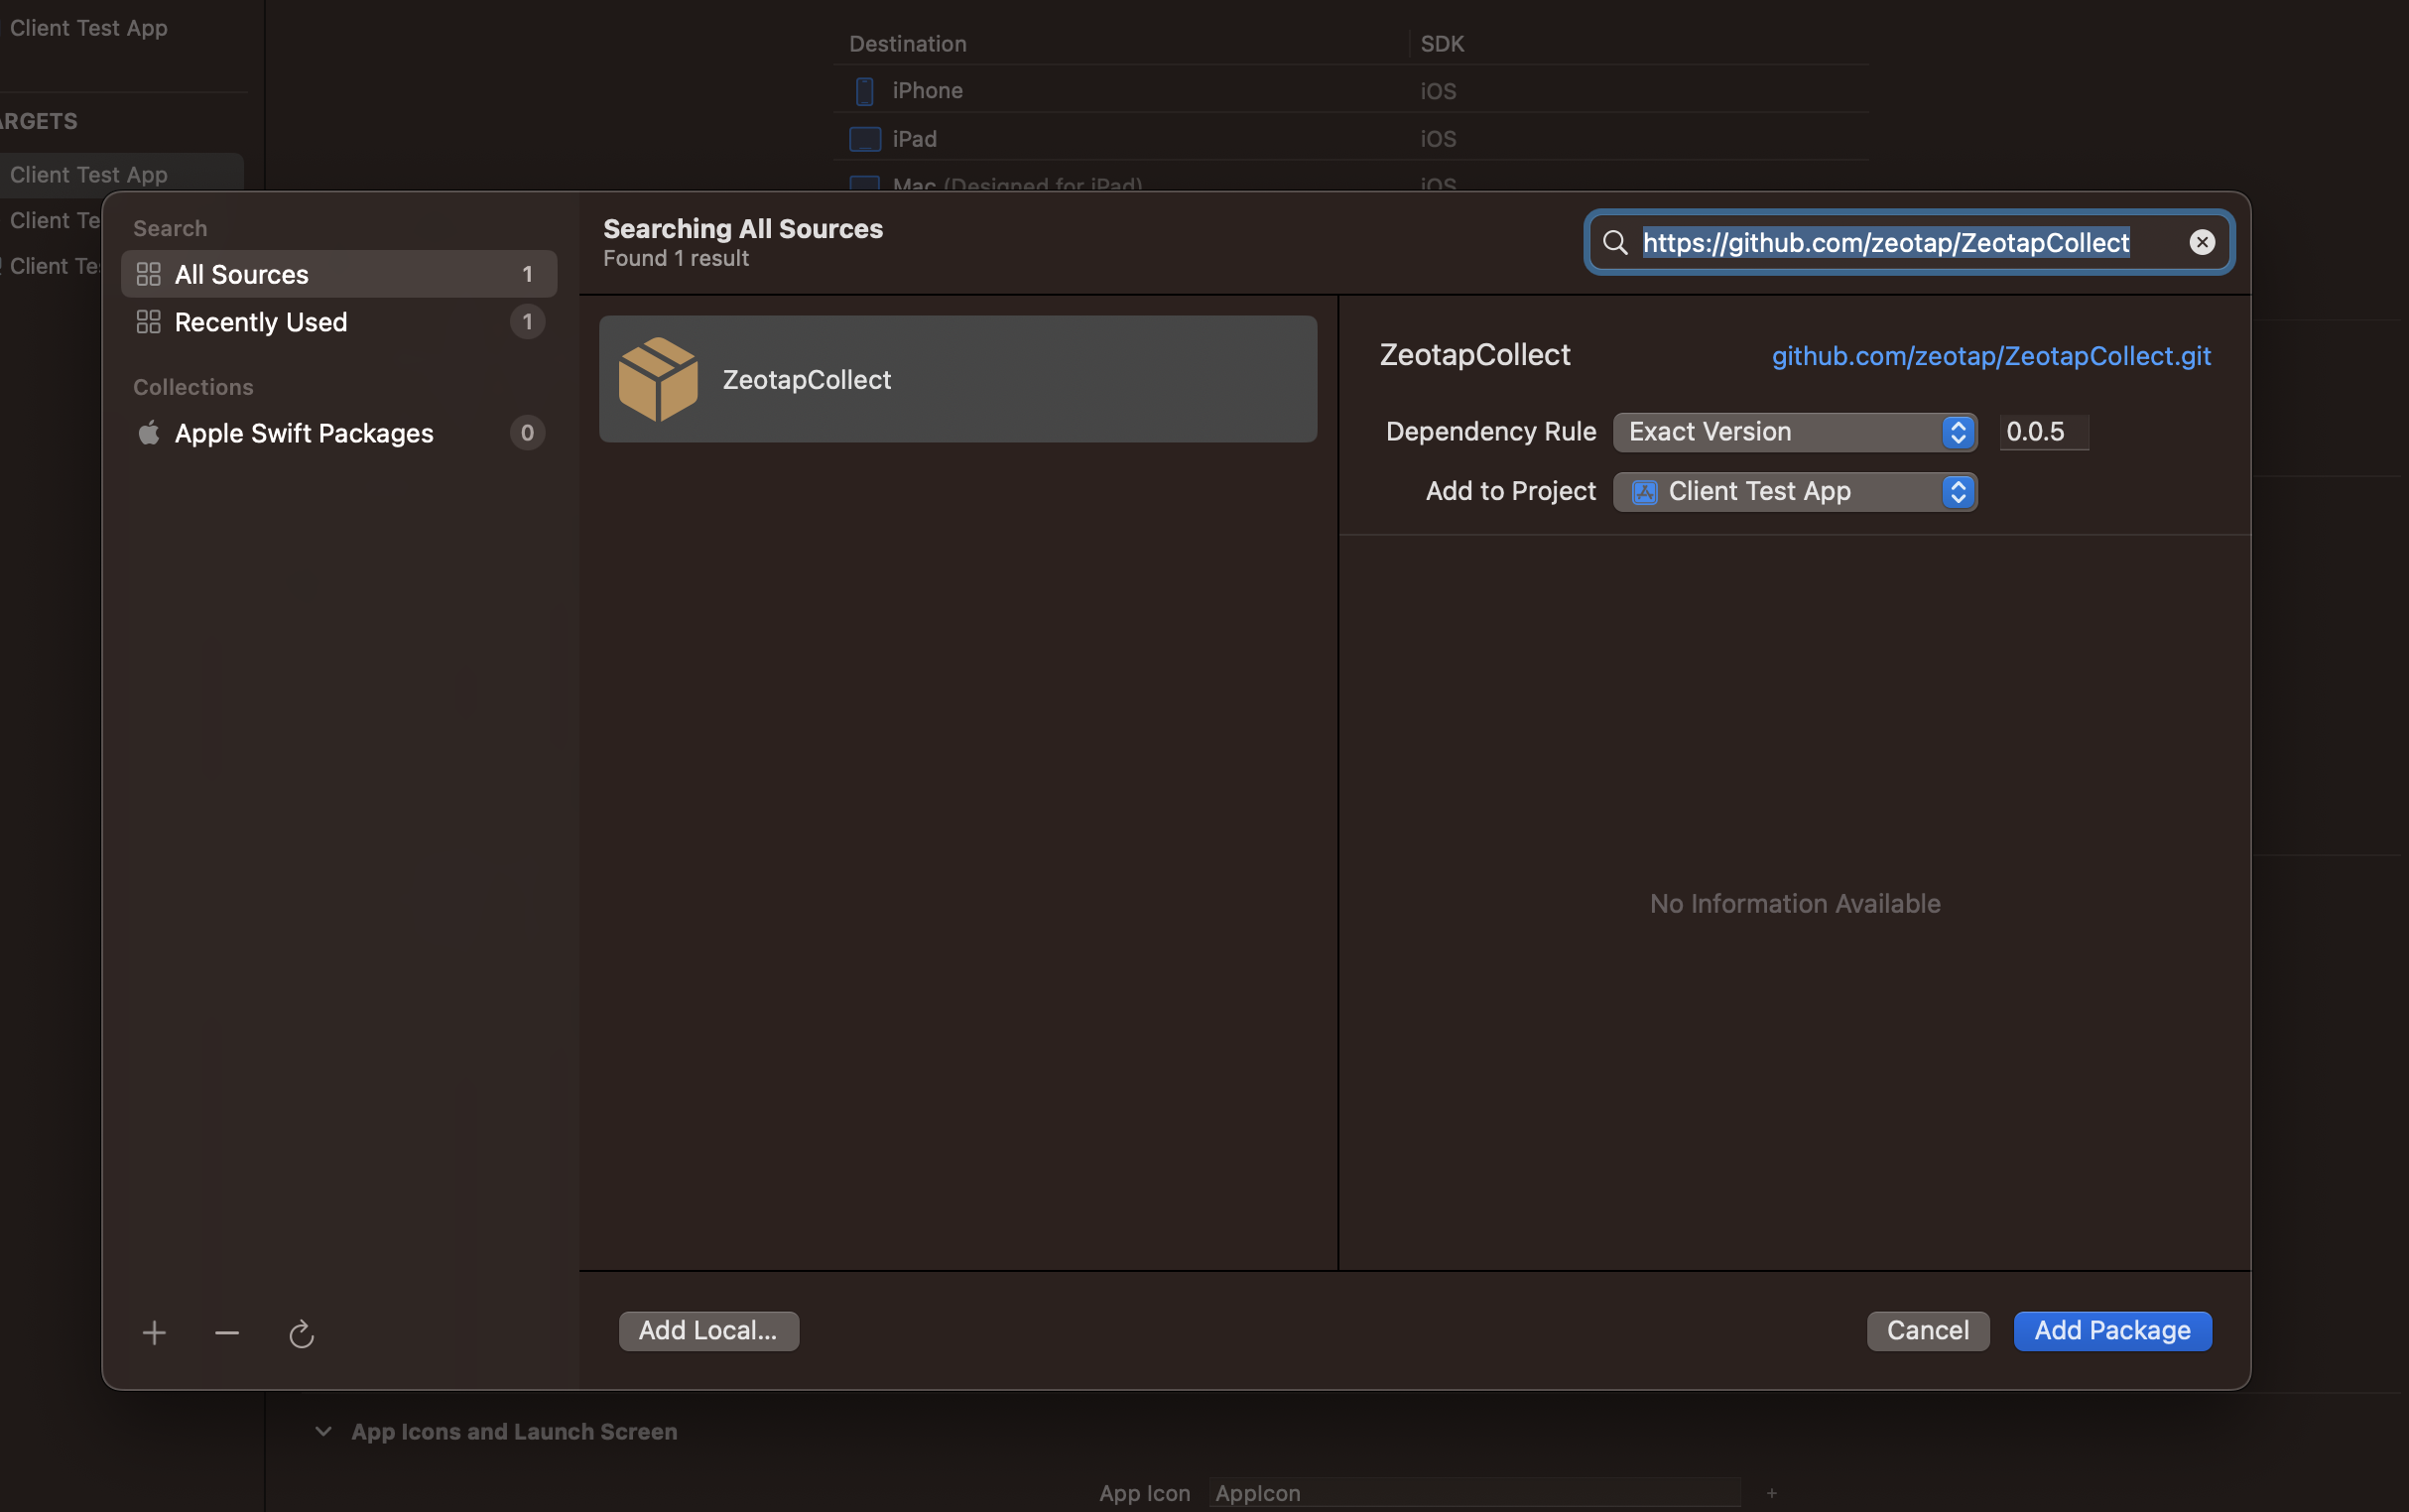
Swift Package Manager
- Open your project in Xcode
- Go to File → Add Package Dependencies
- Enter the repository URL:
https://github.com/zeotap/ZeotapCollect - Click Add Package
- Select the target where you want to add the SDK
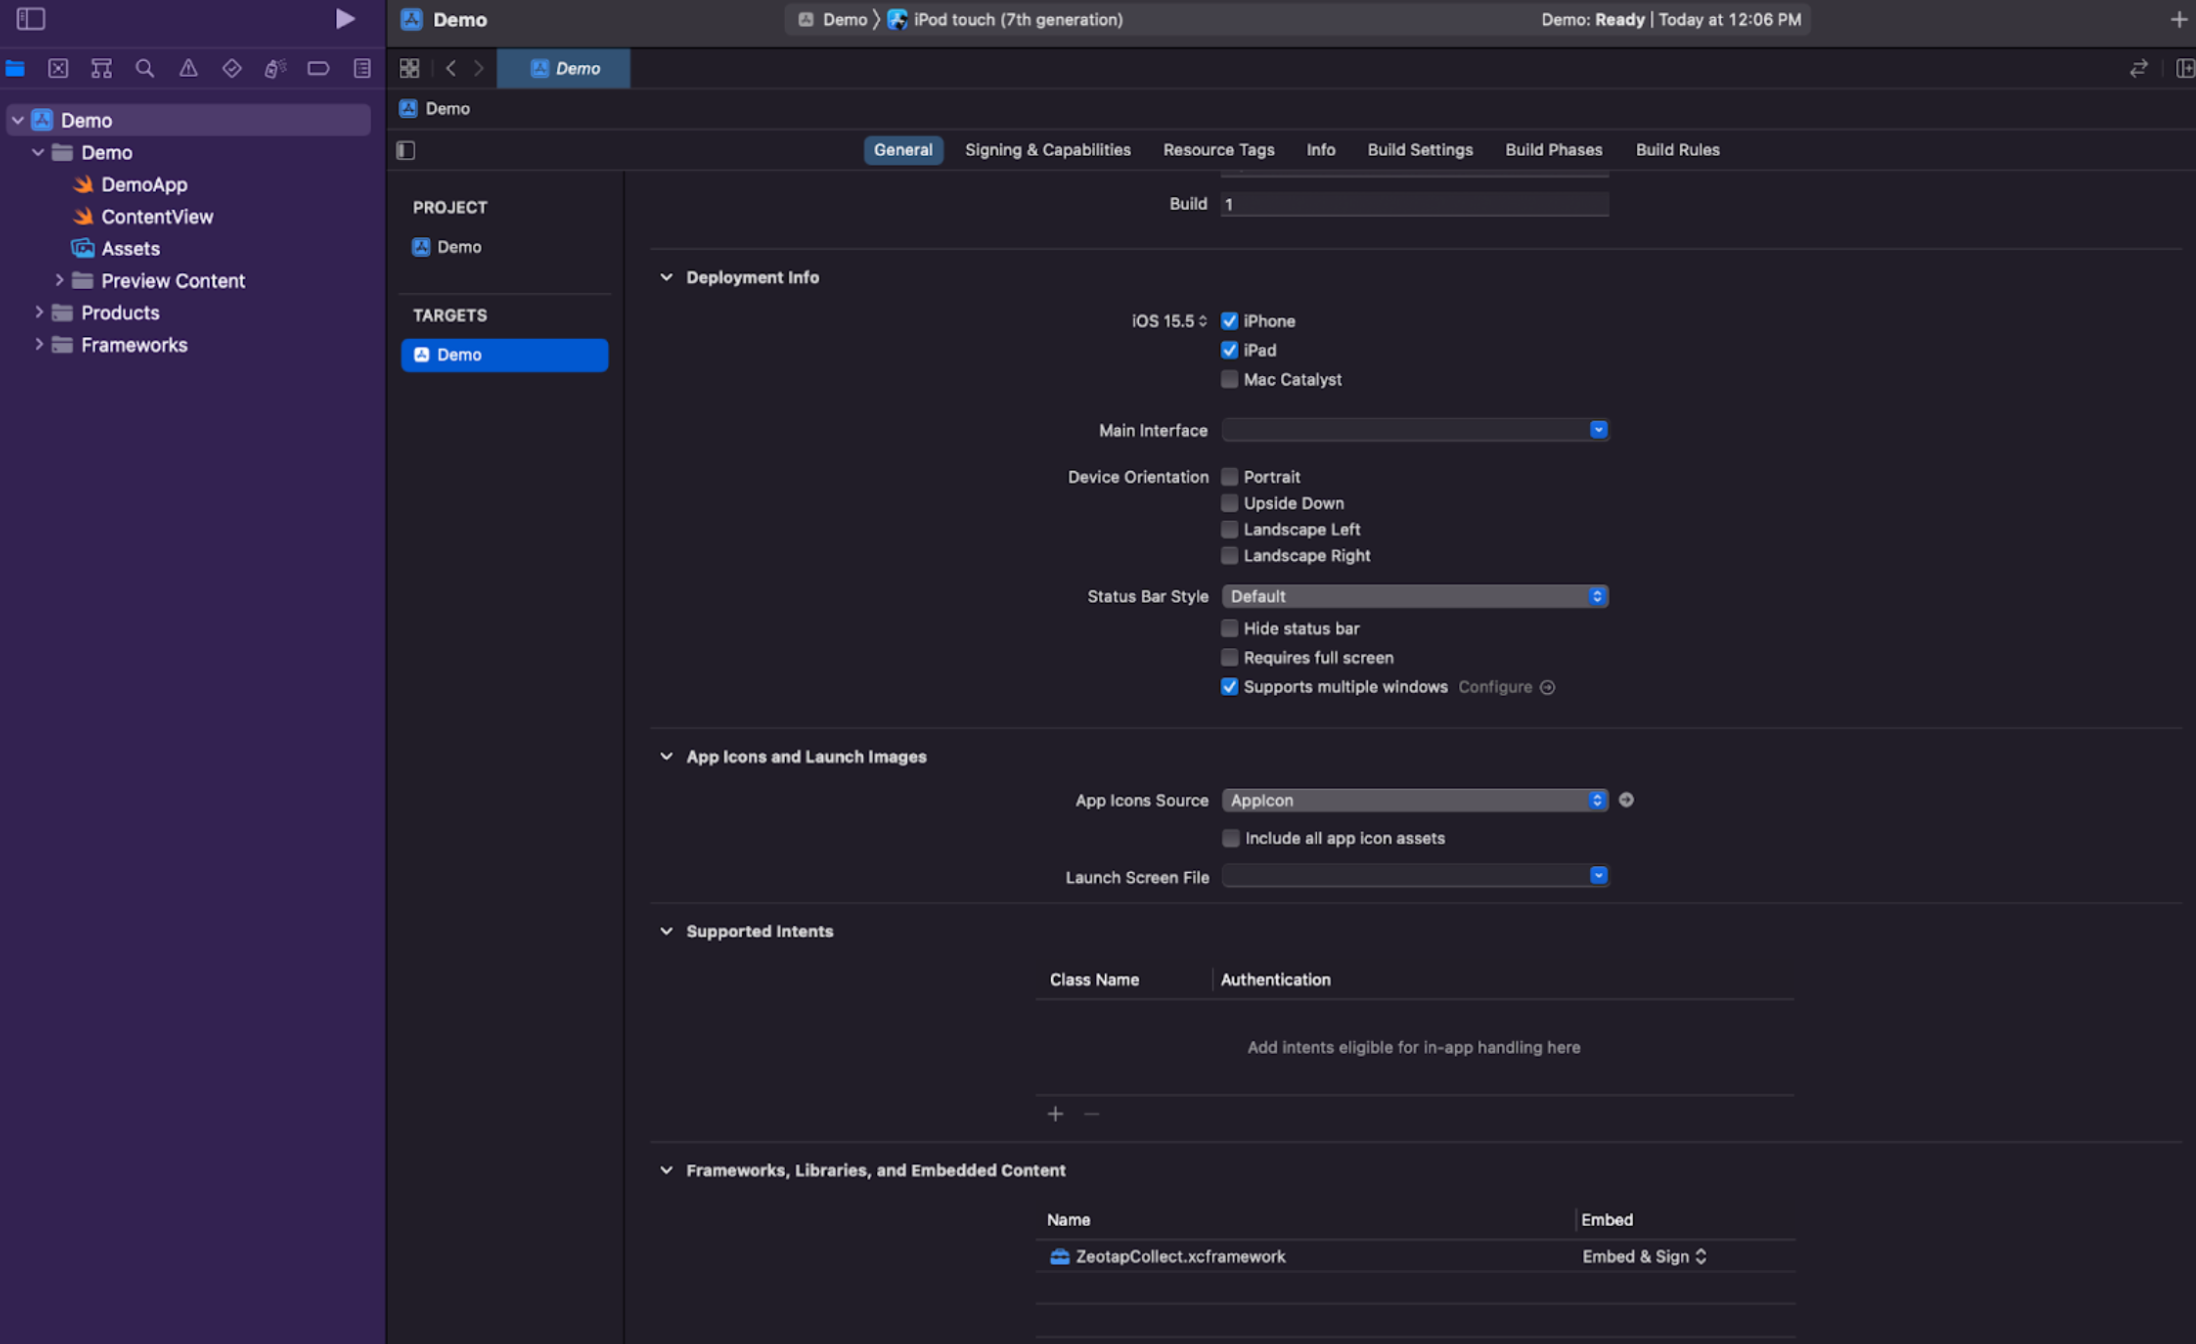
Manual Installation
- Download the latest release from here and Unzip it.
- Launch the project settings by PROJECT → TARGET → General → scroll and find Frameworks, Libraries and Embedded Content
- Add the
ZeotapCollect.xcframeworkinto your Xcode project
Initialization
Import the SDK in your AppDelegate or main app file:
import ZeotapCollect
Initialize the SDK in your application(_:didFinishLaunchingWithOptions:) method:
func application(_ application: UIApplication, didFinishLaunchingWithOptions launchOptions: [UIApplication.LaunchOptionsKey: Any]?) -> Bool {

    // Initialize Zeotap Collect SDK
    var collectOptions = CollectOption().writeKey(value: "YOUR_WRITE_KEY")
                                      .logging(value: false)
                                      .optout(value: false)
                                      .build()
    Collect.initialize(option: collectOptions)

    return true
}
You need to input your write key in place of YOUR_WRITE_KEY so that the data gets ingested to an iOS source created in your Zeotap CDP account.
Setting up User Identities (Learn more)
Once the Zeotap SDK is integrated, you can start setting up user identities. User identities are how you associate data to specific users.
The Zeotap iOS SDK provides the setUserIdentities function to identify your users:
Collect.getInstance()?.setUserIdentities([
    "email": "[email protected]",
    "cellno": "+1 5551234567"
])
Setting User Properties (Learn more)
User properties allow you to store information about your users that doesn't change frequently, such as subscription status, user preferences, or demographic information.
To set user properties, use the setUserProperties method:
Collect.getInstance()?.setUserProperties([
    "subscription": "premium",
    "age": 25,
    "city": "New York"
])
Tracking User Events (Learn more)
Event tracking allows you to track specific actions that users take in your app, such as making a purchase, completing a level, or sharing content.
To track user events, you can use the setEventProperties method:
Collect.getInstance()?.setEventProperties("Product Purchased", [
    "productId": "12345",
    "productName": "iPhone 15",
    "category": "Electronics",
    "price": 999.99,
    "currency": "USD"
])
Example Integration
Here's a complete example of how to integrate the Zeotap iOS SDK:
import UIKit
import ZeotapCollect

@main
class AppDelegate: UIResponder, UIApplicationDelegate {

    func application(_ application: UIApplication, didFinishLaunchingWithOptions launchOptions: [UIApplication.LaunchOptionsKey: Any]?) -> Bool {

        // Initialize Zeotap Collect SDK
        var collectOptions = CollectOption().writeKey(value: "YOUR_WRITE_KEY")
                                          .logging(value: false)
                                          .optout(value: false)
                                          .build()
        Collect.initialize(option: collectOptions)

        // Set user identities after login
        Collect.getInstance().setUserIdentities([
            "email": "[email protected]",
            "userId": "12345"
        ])

        // Set user properties
        Collect.getInstance()?.setUserProperties([
            "subscription": "premium",
            "appVersion": Bundle.main.infoDictionary?["CFBundleShortVersionString"] as? String ?? "unknown"
        ])

        return true
    }
}

class ViewController: UIViewController {

    @IBAction func purchaseButtonTapped(_ sender: UIButton) {
        // Track purchase event
        Collect.getInstance()?.setEventProperties( "Product Purchased", properties: [
            "productId": "12345",
            "price": 29.99,
            "currency": "USD"
        ])
    }
}